Part 1: Introduction to Philadelphia cheesecake recipe
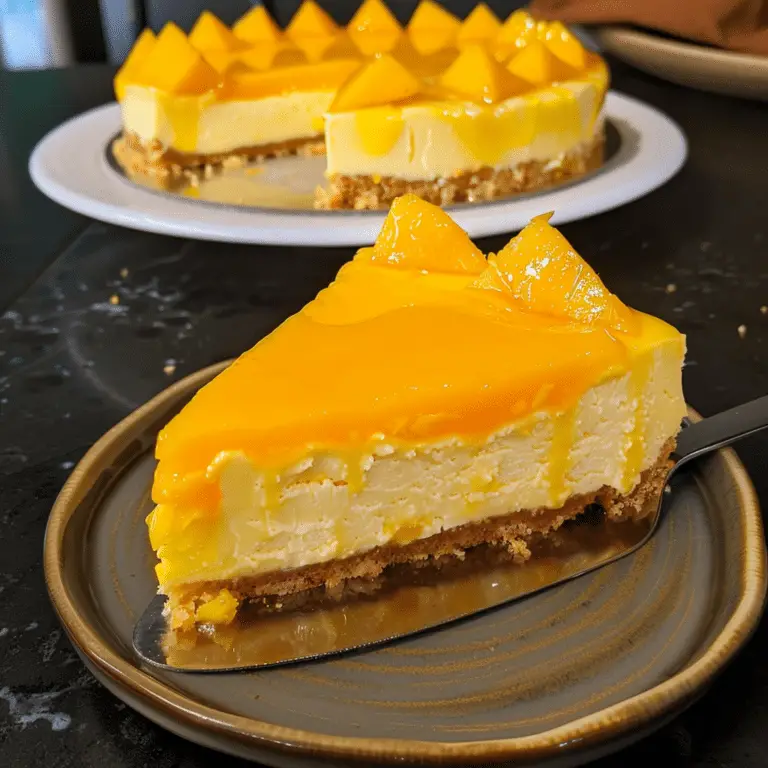
Philadelphia cheesecake recipe . Ever wondered what makes a Philadelphia cheesecake so irresistibly good? It’s a classic dessert that’s been delighting taste buds for ages. But, what’s the secret behind its creamy, dreamy charm?
A Slice of History
Cheesecake isn’t a modern invention. It dates back to ancient Greece, believe it or not! Athletes at the first Olympic Games were treated to this delightful dessert. Fast forward to 19th century America, and cream cheese changed the cheesecake game. The introduction of Philadelphia brand cream cheese gave birth to the famous Philadelphia cheesecake we know and love.
The Philadelphia Difference
So, what sets a Philadelphia cheesecake apart? It’s all in the cream cheese. Philadelphia cream cheese, known for its unbeatable smoothness and rich taste, is the star of this show. It’s not just about being sweet; it’s the perfect mix of sweet and tangy, all wrapped up in a velvety texture. That’s what makes it a top pick for dessert lovers everywhere.
In the next part, we’ll dive into the must-have ingredients and some clever substitutes for making your very own slice of heaven. Get ready to whip up the perfect Philadelphia cheesecake right in your kitchen!
Part 2: Essential Ingredients Philadelphia cheesecake recipe
Creating the perfect Philadelphia cheesecake is all about starting with the right ingredients. But what if you’re catering to dietary restrictions or just don’t have everything on hand? No worries, I’ve got you covered with some smart substitutes too.
Classic Ingredients for Philadelphia Cheesecake
The foundation of any great cheesecake is, of course, the cream cheese. For that authentic Philadelphia flavor, stick with the namesake brand. You’ll need:
- Philadelphia cream cheese for that smooth, creamy texture.
- Sugar to add just the right amount of sweetness.
- Eggs to bind everything together and give it that classic cheesecake texture.
- A crust made from graham crackers for a delightful crunch.
- A dash of vanilla extract for that subtle, yet essential flavor enhancement.
Smart Substitutes
Now, let’s talk substitutes. Whether you’re gluten-intolerant, lactose-intolerant, or just out of eggs, there’s always a way:
- For a gluten-free crust, try almond flour or gluten-free graham crackers.
- Lactose-free cream cheese can replace regular cream cheese without losing much of the texture or taste.
- Out of eggs? A common egg substitute in baking is a mixture of ground flaxseed and water.
- For a sugar alternative, consider using honey or maple syrup. Just be mindful of the liquid content.
With these ingredients and substitutes, you’re well on your way to making a Philadelphia cheesecake that’s not only delicious but also caters to various dietary needs. Next up, we’ll step into the world of mixing, baking, and perfecting the cheesecake. Stay tuned!
Part 3: Step-by-Step Recipe Guide to Philadelphia cheesecake recipe
Now that you’ve got your ingredients ready, let’s dive into the heart of making a Philadelphia cheesecake. Follow these steps, and you’re on your way to a dessert that’s bound to impress.
Preparing the Crust
First things first, the crust. It’s not just a base; it’s the foundation of flavor and texture.
- Mixing the Crust: Combine crushed graham crackers with melted butter and a bit of sugar. This mix gives you that perfect balance of sweet and crunchy.
- Pressing the Crust: Evenly press the mixture into the bottom of your pan. A flat-bottomed glass can help get a smooth, even layer.
- Baking the Crust: A quick bake in the oven, about 8-10 minutes at 325°F (163°C), sets the crust and enhances its flavor.
Mixing the Filling
The filling is where the magic happens. It’s all about getting that creamy, dreamy texture.
- Creaming the Cheese: Start with room-temperature Philadelphia cream cheese. Beat it until it’s smooth and creamy. This step is crucial for a lump-free cheesecake.
- Adding Sweetness and Flavor: Gradually add sugar and vanilla extract, mixing until well combined.
- Incorporating Eggs: Add eggs one at a time, mixing just enough to incorporate. Overmixing can cause the cheesecake to rise and fall, leading to cracks.
Baking and Cooling
Baking a cheesecake is an art. It’s slow and steady, ensuring a perfectly set, crack-free top.
- Slow Bake: Pour the filling over the crust and smooth the top. Bake at 325°F (163°C) for about 50 minutes. The edges should be set, but the center slightly wobbly.
- Cooling: Turn off the oven and crack the door open. Let the cheesecake cool inside for an hour. This gradual cooling helps prevent cracking.
- Chilling: After cooling, refrigerate the cheesecake for at least 4 hours, preferably overnight. This step is essential for that firm, yet creamy texture.
And there you have it! A step-by-step guide to creating a classic Philadelphia cheesecake. Up next, we’ll explore some delicious variations to this classic recipe. Stay tuned for more creamy, cheesy goodness!
Part 5: Presentation and Serving Your Cheesecake
Now that your Philadelphia cheesecake is ready to impress, let’s talk about how to make it look and taste even more incredible.
Dressing it Up Philadelphia cheesecake recipe
Garnishing your cheesecake is like giving it a red-carpet treatment. Here are some easy yet stunning ideas:
- Fresh Fruits: Add a burst of color with fresh berries, kiwi slices, or citrus wedges. Nature’s candy makes your dessert pop!
- Whipped Cream: A swirl of whipped cream around the edges adds a touch of elegance. It’s the classic choice for a reason.
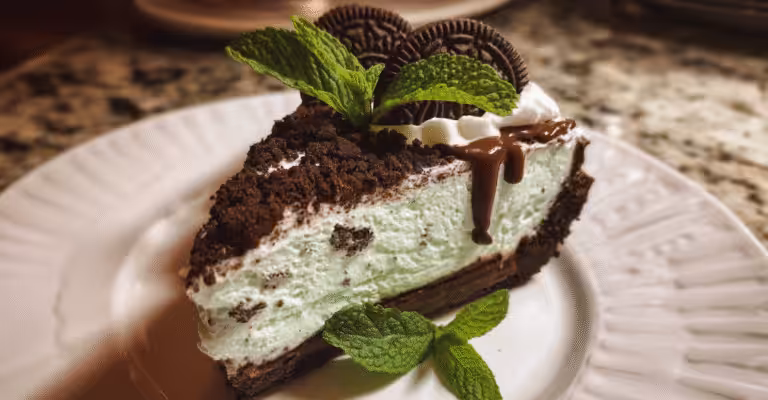
- Chocolate Lover’s Dream: Sprinkle chocolate shavings or drizzle some chocolate sauce for that irresistible cocoa touch.
Perfect Pairings Philadelphia cheesecake recipe
Pairing your cheesecake with the right drink or side dish can take your dessert experience to a whole new level.
- Coffee or Tea: A hot cup of coffee or tea is the cheesecake’s best friend. It balances the richness with a comforting sip.
- Dessert Wines: Consider a sweet dessert wine or a sparkling Moscato for a sophisticated touch.
- Fresh Salad: If you’re serving the cheesecake as part of a meal, a light salad with a zesty dressing can provide a refreshing contrast.
With these simple yet effective tips, your Philadelphia cheesecake will steal the spotlight at any gathering. In our next section, we’ll explore common mistakes and share some troubleshooting tips to ensure your cheesecake turns out perfect every time. Keep reading!
Part 7: FAQs About Making Philadelphia cheesecake recipe
Got questions about creating the perfect Philadelphia cheesecake? You’re not alone! Here are some of the most common queries, answered for you:
Q1: Can I use any cream cheese for a Philadelphia cheesecake?
A: While you can use other brands of cream cheese, using Philadelphia cream cheese will give you that authentic flavor and creamy texture that this cheesecake is known for.
Q2: How do I prevent my cheesecake from cracking?
A: To prevent cracks, avoid overmixing the batter, bake in a water bath, and cool the cheesecake gradually. If it does crack, you can easily cover it with toppings.
Q3: Can I make a no-bake Philadelphia cheesecake?
A: Absolutely! A no-bake version is quick and delicious. Mix your Philadelphia cream cheese with whipped cream and set it in the fridge for a few hours or overnight.
Q4: Can I freeze a Philadelphia cheesecake?
A: Yes, you can! Wrap it well in plastic wrap and aluminum foil before freezing. Thaw it in the refrigerator before serving.
Q5: What’s the secret to a creamy texture in a Philadelphia cheesecake?
A: Room temperature ingredients, gentle mixing, and not overbaking are the keys to that luxurious creaminess.
Q6: Can I make a gluten-free Philadelphia cheesecake?
A: Absolutely! You can use gluten-free graham crackers or almond flour for the crust to make it gluten-free.
Q7: How long can I store a Philadelphia cheesecake?
A: A well-wrapped cheesecake can be stored in the refrigerator for up to a week or frozen for several months.
Armed with these answers, you’re ready to conquer your Philadelphia cheesecake journey. In our final section, we’ll wrap up the delicious experience with a sweet conclusion.