Homemade Gummy Bears: A Sweet Journey from History to Your Kitchen.
Introduction to Homemade Gummy Bears
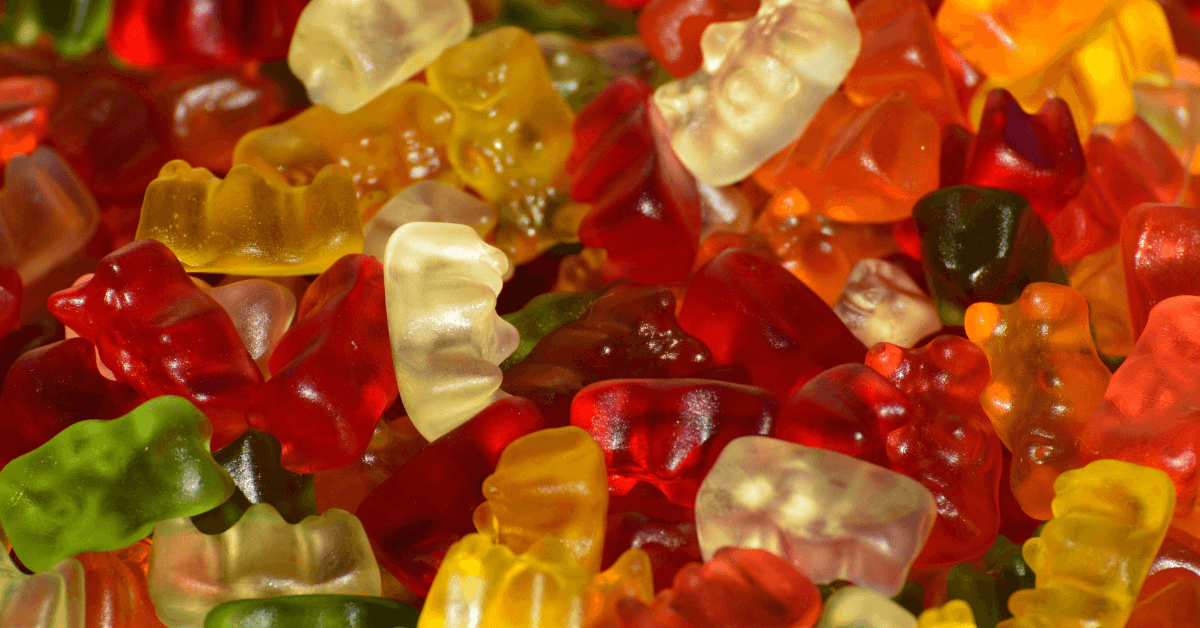
Gummy bears… just the mention of these little chewy, sweet treats can bring a smile to anyone’s face, young or old. But have you ever wondered about the journey of these delightful candies from a simple idea to a global sensation? Let’s dive into the colorful world of homemade gummy bears and discover how you can bring this iconic candy into your kitchen.
The Sweet Beginning: A Brief History
The story of gummy bears begins in the early 1920s with a German entrepreneur, Hans Riegel. He started his candy company, Haribo, and created the first gummy candies shaped like bears. Inspired by the trained bears seen at street festivals in Europe, these gummies were originally made with gum Arabic, hence the name. Today, however, the base ingredient is edible gelatin, giving gummy bears their signature chewy texture and long shelf life.
Why Gummy Bears Have Captured Hearts
Since their inception, gummy bears have not just been a candy; they’ve become a part of pop culture. From being a simple treat, they’ve evolved into various forms, including vitamin supplements, to make them more attractive to children. But why do they continue to be so popular? Perhaps it’s their perfect combination of sweetness, chewiness, and the joy of picking your favorite color or flavor. Or maybe it’s the nostalgia they evoke, reminding adults of their childhood.
The Global Gummy Phenomenon
From Germany, the craze for gummy bears spread worldwide, becoming a staple in candy aisles everywhere. Their popularity soared in the 1980s, and today, they are more than just a treat; they’re a symbol of joy and childhood innocence.
So, why not take this global phenomenon and make it your own? In the next sections, we’ll explore how you can create homemade gummy bears, experimenting with flavors, colors, and shapes, and perhaps even start a new family tradition. Stay tuned as we delve into the ingredients and equipment needed to bring these adorable bears to life in your kitchen!
Ingredients and Equipment for Crafting Homemade Gummy Bears
Embarking on the adventure of making homemade gummy bears is not just fun, but it’s also a delightful way to customize this classic treat. Let’s explore the essential ingredients and equipment you’ll need to bring these little bears to life.
Key Ingredients for Your Gummy Bears
The beauty of homemade gummy bears lies in their simplicity. The basic ingredients include:
- Water: The foundation of your gummy mixture.
- Sugar: For that essential sweetness. You can also explore sugar alternatives for a healthier twist.
- Gelatin: The star player, edible gelatin gives the gummies their iconic chewy texture.
- Flavoring: This is where you can get creative! Use natural fruit juices for a healthier option or traditional flavorings for that classic taste.
- Food Coloring: To add that vibrant, inviting look. Natural colorings are great for a healthier version.
Choosing the Right Gelatin
Gelatin is crucial in achieving the perfect gummy texture. But did you know there are different types? From traditional gelatin derived from animal collagen to vegetarian options like agar-agar, the choice can impact the texture and dietary suitability of your gummy bears.
The Equipment You’ll Need
You don’t need a candy factory to make gummy bears at home. Here’s what you’ll need:
- Saucepan: For combining and heating your ingredients.
- Whisk or Spoon: To mix everything evenly.
- Gummy Bear Molds: These silicone molds give your candies their cute bear shape.
- Dropper: A handy tool for filling the molds without mess.
Natural vs. Artificial Flavorings: A Sweet Decision
When it comes to flavorings, you’re at a crossroads. Do you go for natural fruit juices and extracts for a healthier, more authentic taste, or stick to artificial flavorings for that nostalgic, classic gummy bear flavor? The choice is yours, and it’s a fun one to make!
The Fun of DIY Candy Making
Making gummy bears at home isn’t just about the end product; it’s about the experience. It’s a chance to experiment with flavors, play with colors, and even involve kids in a fun and educational kitchen activity.
The Making Process of Homemade Gummy Bears
Now that you’re equipped with the ingredients and tools, let’s dive into the heart of making homemade gummy bears. This process, while simple, requires a bit of precision and a lot of creativity. So, roll up your sleeves and let’s get started!
Step-by-Step Guide to Making Gummy Bears
- Mixing the Ingredients: Start by combining water, sugar, and gelatin in your saucepan. Stir the mixture gently over low heat until the sugar and gelatin dissolve completely.
- Adding Flavor and Color: Once the base is smooth, it’s time to add your flavorings and food coloring. This is where you can get creative – mix and match to create your unique flavors and vibrant colors.
- Pouring into Molds: Use a dropper to carefully fill your gummy bear molds. This step requires a steady hand, but it’s also where the fun begins!
Cooking Techniques and Temperature Control
Cooking your gummy mixture is more about patience than complexity. The key is to keep the heat low and constant, ensuring that the gelatin dissolves without boiling. Boiling can affect the texture of your gummies, so gentle heat is your friend here.
Molding and Setting the Gummy Bears
After filling the molds, let them set at room temperature for about an hour, then transfer them to the refrigerator. This setting process is crucial for achieving that perfect gummy texture. Patience is key – let them chill for at least a few hours, or even overnight for best results.
Troubleshooting Common Issues
- Gummies Too Hard or Too Soft: This usually comes down to the gelatin. Adjust the amount slightly in your next batch for a different texture.
- Air Bubbles or Imperfections: Tap the molds gently after filling to remove air bubbles and ensure a smooth surface.
- Flavor Too Weak or Too Strong: Adjust the amount of flavoring and taste your mixture before pouring it into molds.
Making homemade gummy bears is a delightful blend of science and art. As you experiment with different flavors and colors, you’ll not only create delicious treats but also make memories and perhaps even start a new tradition. In the next part, we’ll explore flavor variations and creative ideas to take your gummy bears to the next level. Stay tuned for more sweet adventures!
Flavor Variations and Creative Ideas for Homemade Gummy Bears
Creating homemade gummy bears is not just about replicating the classic candy; it’s an opportunity to infuse your personal touch and imagination. Let’s explore how you can experiment with flavors, colors, and shapes to make your gummy bears uniquely delightful.
Exploring Different Flavors
The world of flavors is vast and exciting. You can stick to the classic fruit flavors like raspberry, strawberry, and lemon, or venture into exotic territories with mango, coconut, or even mixed fruit combinations. Don’t shy away from experimenting with herbal or floral notes like lavender or mint for a grown-up twist.
Innovative Shapes and Colors
While bear shapes are traditional, the sky’s the limit when it comes to creativity. You can find molds in various shapes like hearts, stars, or even thematic ones like Halloween or Christmas shapes. Colors add another layer of fun. Mix and match food colorings to create a rainbow of gummy bears, or use natural color sources like beet juice for red or spirulina for green.
Healthy Alternatives and Dietary Considerations
For those mindful of health or dietary restrictions, there are plenty of options. Use sugar substitutes like stevia or honey for a lower sugar content. Agar-agar can replace gelatin for a vegan alternative. Incorporating fruit and vegetable juices not only adds natural flavors but also boosts the nutritional value.
The Joy of Customization
Imagine creating a batch of gummy bears tailored to a special occasion or as personalized gifts. From birthday parties to holiday gatherings, your homemade gummy bears can be the perfect, thoughtful touch to any event.
Engaging Kids in the Kitchen
Making gummy bears can be a fun and educational activity for kids. It’s an opportunity to teach them about cooking, measurements, and even nutrition. Plus, the excitement of creating and enjoying their own candy is a great way to spend quality time together.
As we wrap up this section, remember that making gummy bears at home is about more than just the end product; it’s about the joy of creating something with your own hands and sharing it with others. In the next part, we’ll discuss how to preserve and store your homemade gummy bears to ensure they stay fresh and delicious. Stay tuned for these essential tips!
Preservation and Storage of Homemade Gummy Bears
After enjoying the creative process of making homemade gummy bears, it’s important to know how to store them properly. Proper storage not only extends their shelf life but also maintains their texture and flavor. Let’s delve into the best practices for keeping your gummy bears fresh and delicious.
Best Practices for Storing Homemade Gummy Bears
- Cool and Dry Environment: Store your gummy bears in a cool, dry place. Excessive heat can cause them to melt, while humidity can make them sticky.
- Airtight Containers: Use airtight containers to prevent exposure to air, which can dry out the gummies.
- Separating Flavors: If you’ve made multiple flavors, consider storing them separately. This prevents the flavors from blending and maintains the distinct taste of each one.
Shelf Life and Freshness Tips
- Refrigeration: For longer shelf life, you can refrigerate your gummy bears. This is especially useful in warmer climates.
- Freezing: Freezing is an option, but it may alter the texture of the gummies. If you choose to freeze them, let them thaw at room temperature before enjoying.
- Checking for Freshness: Homemade gummy bears typically last for a few weeks. If they start to harden or change in texture, it’s time to make a new batch!
Avoiding Common Storage Mistakes
- Avoid Direct Sunlight: Sunlight can cause the colors to fade and the gummies to melt.
- Not Overcrowding the Container: Give your gummy bears some space. Overcrowding can cause them to stick together.
- Regular Checks: Periodically check your stored gummy bears for any signs of spoilage or texture changes.
Storing your homemade gummy bears correctly ensures that every time you reach for them, they’re just as good as when you first made them. In the next part, we’ll wrap up with a conclusion, recapping the joys and delights of making your own gummy bears. Stay tuned for our final thoughts and a sweet goodbye!
FAQs – Answering Your Gummy Bear Queries
In this section, let’s address some common questions about making homemade gummy bears, aiming to clear up any confusion and help you perfect your gummy-making skills.
Q1: Can I Make Gummy Bears Without Gelatin?
A: Absolutely! For a vegetarian or vegan alternative, you can use agar-agar, a plant-based gelatin substitute. The texture might be slightly different, but you’ll still get delicious, chewy gummies.
Q2: How Can I Make My Gummy Bears Sour?
A: To add a tangy twist to your gummy bears, coat them in a mixture of citric acid and sugar after they’ve set. Adjust the amount of citric acid to suit your taste for that perfect sour kick.
Q3: Can I Use Fresh Fruit Juice in My Gummy Bears?
A: Yes, using fresh fruit juice is a great way to add natural flavor and reduce artificial ingredients. Just be aware that the flavor might be milder compared to concentrated flavorings.
Q4: How Long Do Homemade Gummy Bears Last?
A: Typically, they can last up to a few weeks if stored properly in an airtight container in a cool, dry place. Refrigeration can extend their shelf life further.
Q5: Why Are My Gummy Bears Sticky?
A: Stickiness usually occurs due to humidity. To prevent this, ensure they are fully set before storing and use cornstarch to coat them lightly if needed.
“Homemade Gummy Bears.” These links can be integrated as rich anchor text within the content to enhance the user experience and SEO:
- For Part 2 (Ingredients and Equipment):
- Link to “Vegetarian Cooking Guide: Recipes & Tips”
- Anchor Text: “For more insights on vegetarian-friendly ingredients, check out our comprehensive Vegetarian Cooking Guide.”
- Link to “Vegetarian Cooking Guide: Recipes & Tips”
- For Part 3 (The Making Process):
- Link to “Air Fryer Breakfast Potatoes Guide”
- Anchor Text: “Explore our Air Fryer Breakfast Potatoes Guide for more tips on perfecting cooking techniques.”
- Link to “Air Fryer Breakfast Potatoes Guide”
- For Part 4 (Flavor Variations and Creative Ideas):
- Link to “Vegan Fall Recipes”
- Anchor Text: “Get inspired by our collection of Vegan Fall Recipes for more creative and healthy flavor ideas.”
- Link to “Vegan Fall Recipes”
Homemade Gummy Bears
- Total Time: 20 minutes + 2 hours setting time
- Yield: Approximately 100 gummy bears 1x
- Diet: Vegetarian
Description
Homemade gummy bears are a fun and customizable treat that you can easily make in your kitchen. These chewy, colorful candies are perfect for parties, gifts, or just a sweet snack. By making them at home, you can choose your flavors and ingredients, ensuring a delightful treat that can be tailored to various dietary needs.
Ingredients
- 1/2 cup cold water
- 2 tablespoons gelatin (or agar-agar for a vegan option)
- 1/2 cup granulated sugar (or honey for a healthier alternative)
- 1 teaspoon fruit flavoring (like strawberry, lemon, or raspberry)
- Food coloring (optional)
- Silicone gummy bear molds
- Dropper
Instructions
- In a small saucepan, sprinkle the gelatin over the cold water. Let it sit for a few minutes to bloom.
- Heat the mixture over low heat, stirring constantly until the gelatin completely dissolves.
- Add the sugar and continue stirring until it dissolves.
- Remove the saucepan from heat and add the fruit flavoring and food coloring. Stir well.
- Using a dropper, carefully fill each cavity of the silicone gummy bear molds with the mixture.
- Refrigerate the molds for at least 2 hours or until the gummy bears are firm.
- Once set, gently pop the gummy bears out of the molds.
- Store the gummy bears in an airtight container in the refrigerator.
Notes
- For sour gummy bears, coat them in a mix of citric acid and sugar after they are set.
- The flavoring and color can be adjusted according to preference.
- If using agar-agar, the texture will be slightly different from traditional gelatin-based gummy bears.
- Prep Time: 10 minutes
- Cook Time: 10 minutes
- Category: Candy
- Method: Refrigeration
- Cuisine: American